
Is the trip reset button or fuel economy display control on your car’s dashboard suddenly unresponsive? You’re not alone. Many car owners, especially those with models like the Chevy Tahoe or GMC Yukon, experience issues with their dash buttons. Often, it’s just a single button that stops working, while the others function perfectly. The good news is, this is often a straightforward fix that you can handle yourself, potentially saving you a trip to the mechanic. The solution often involves replacing the switch assembly, and thankfully, removing the old one is easier than you might think, especially with the right tools readily available on platforms like eBay.
Identifying a Faulty Dash Button
Before you start searching for parts, let’s confirm the problem. Typically, a failing dash button will show one of these symptoms:
- No Response: Pressing the button yields absolutely no change on your instrument cluster display. This is the most common complaint, as seen with the Tahoe owner in our forum example.
- Intermittent Response: Sometimes the button works, sometimes it doesn’t, suggesting a loose connection or failing component.
- Sticking or Jammed Button: The button feels physically stuck or doesn’t spring back properly when pressed. While less common for electronic buttons, debris or wear can cause this.
If you’re experiencing any of these issues, particularly the first symptom where the button is completely unresponsive, replacing the switch assembly is likely the solution.
Gathering Your Tools: The Essential Dash Button Removal Tool & More
To tackle this DIY repair, you won’t need a garage full of equipment. Here’s what’s recommended:
-
Car Dash Button Removal Tool: This is your key to easily and safely removing the trim surrounding the button assembly. These tools are typically made of plastic to prevent scratching or damaging your car’s interior. A quick search on eBay for “car dash button removal tool” will reveal numerous affordable options, often in sets that include various shapes and sizes for different car models.
-
Plastic Trim Removal Tools (Optional but Recommended): While a dedicated dash button removal tool might suffice, a set of plastic trim removal tools provides added versatility. These sets, also readily found on eBay, usually include wedge-shaped tools and prying tools that help you gently detach trim panels without causing damage. The original forum thread even links to an Amazon set, highlighting their usefulness.
-
Small Flathead Screwdriver (Potentially): In some cases, you might need a small flathead screwdriver to gently assist in releasing clips or tabs, but plastic tools are generally preferred to minimize risk.
-
Replacement Switch Assembly: Once you’ve confirmed the issue and are ready to replace the button, you’ll need to source a new switch assembly. eBay and Amazon are excellent places to find these parts. Search for your car’s year, make, and model along with “dash button switch assembly” or “DIC switch” (Driver Information Center switch) to find the correct replacement.
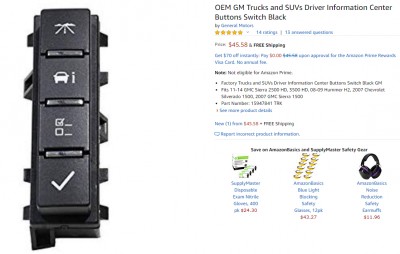 Car dash switch assembly replacement part
Step-by-Step Guide to Dash Button Removal and Replacement
Based on the advice from experienced forum members, here’s a simplified guide to replacing your dash button switch:
-
Prepare the Area: Turn off your car’s ignition. It’s also a good idea to let the car sit for a few minutes to ensure all electronics are fully powered down.
-
Locate the Trim Panel: Identify the trim panel that houses the button assembly. In the Tahoe/Yukon example, it’s the piece that spans across the dash, around the instrument cluster.
-
Use the Removal Tool to Gently Pry: This is where your car dash button removal tool comes in handy. Carefully insert the tool between the trim panel and the surrounding dashboard. Apply gentle pressure to start prying the trim loose. If you’re using a trim removal tool set, start with a wider wedge to create a gap, then switch to thinner tools to work around the edges.
-
Release the Tabs: As you gently pry, you should feel or hear the trim clips releasing. Work your way around the trim panel, releasing each clip. Avoid forcing anything. If it feels stuck, re-examine the area for additional clips or screws (though typically these trim pieces are held in by clips alone).
-
Access the Switch Assembly: Once the trim panel is loose, you should be able to access the back of the switch assembly.
-
Unplug the Old Switch: Locate the electrical connector plugged into the back of the faulty switch assembly. Gently depress any retaining clips on the connector and unplug it.
-
Remove the Old Switch Assembly: There are usually tabs or clips holding the switch assembly into the trim panel. Carefully release these tabs to remove the old switch.
-
Install the New Switch Assembly: Align the new switch assembly with the opening in the trim panel and snap it into place until the retaining tabs click.
-
Reconnect the Electrical Connector: Plug the electrical connector into the back of the new switch assembly until it clicks securely.
-
Reinstall the Trim Panel: Carefully align the trim panel back into its original position on the dashboard. Press firmly along the edges until all the clips are securely re-engaged.
-
Test the Button: Turn your car’s ignition back on and test the newly replaced dash button. It should now be working correctly.
Find Your Dash Button Fix on eBay
Replacing a faulty car dash button is a repair that’s well within the capabilities of most DIY car owners. With the help of affordable car dash button removal tools and replacement parts readily available on eBay, you can restore full functionality to your dashboard and avoid unnecessary dealership costs. Take your time, be gentle with the trim panels, and enjoy the satisfaction of fixing it yourself!