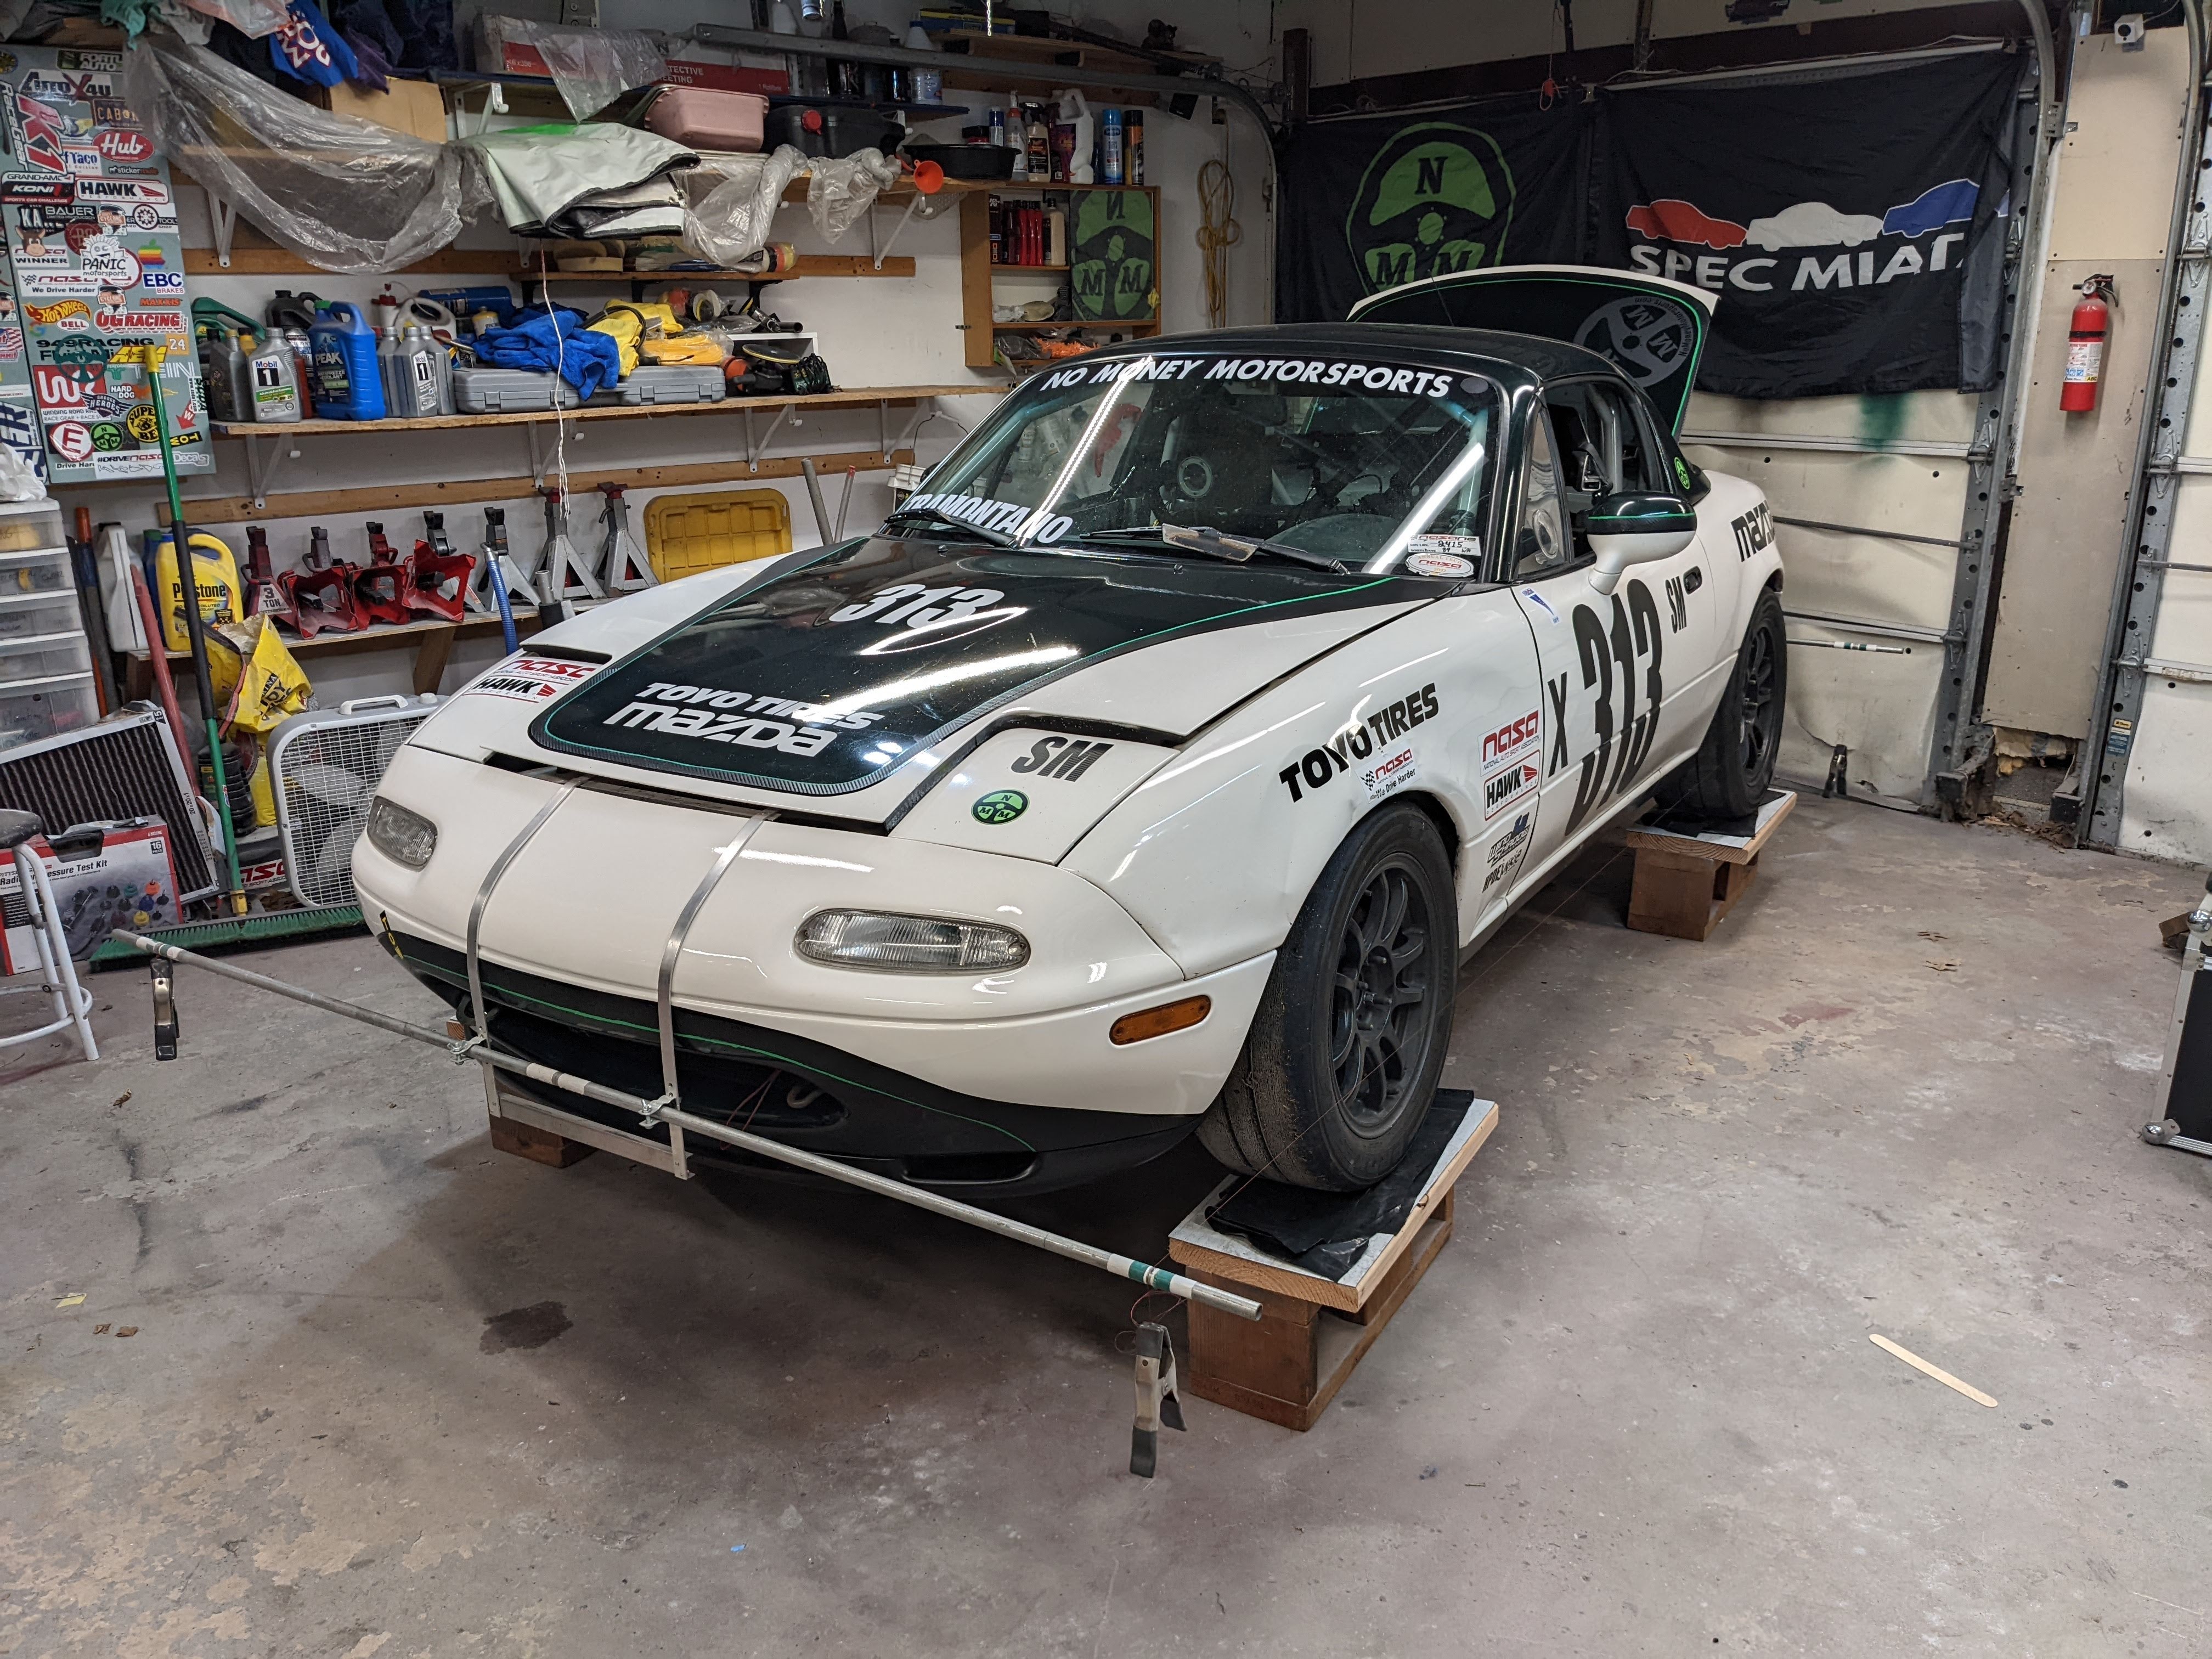
Want to achieve precise alignments for your race car without breaking the bank on expensive equipment or frequent shop visits? Accurate track alignments are achievable with basic tools and a DIY approach. This guide provides a step-by-step process for building your own Race Car Laser Alignment Tools, saving you money while ensuring your car performs at its best.
Alignment is crucial for optimal race car performance. A proper alignment maximizes tire grip, improves handling under braking and cornering, and reduces tire wear. While professional shops utilize high-end laser alignment machines, a DIY setup using string and basic tools can achieve comparable accuracy with patience and attention to detail. This guide focuses on building a string-based alignment system, a method often employed even by professional race shops for its precision.
Essential Components for DIY Race Car Laser Alignment
1. Preparation: Before starting, ensure your car’s suspension components are in good working order, free of excessive rust or damage. Replace any worn or seized alignment bolts. For Miatas, this involves replacing all eight alignment bolts, a common maintenance item for serious racers.
2. Vehicle Setup: Position the car on level, sturdy blocks or stands, ensuring the suspension is fully loaded as if on the track. Simulate driver weight with sandbags or a similarly weighted person. This accurately reflects real-world conditions.
3. Slip Plates: Allow for smooth adjustments by placing slip plates under the tires. Heavy-duty garbage bags or linoleum tiles with lubricant work effectively. This enables the tires to move freely during adjustments.
4. Toe Plates: Accurate toe measurement is essential. While a string box helps determine individual wheel toe, toe plates provide overall toe for front and rear, crucial for trackside adjustments. Invest in a reliable metal set.
5. String Box Construction: The core of the system is a rectangular string “box” around the car. Create brackets to hang from the car’s bumpers, supporting horizontal bars made of EMT conduit. These bars hold the string, forming the alignment reference frame.
6. String and Clamps: Use brightly colored fishing line (12lb test recommended) for visibility. Secure the string to the horizontal bars with spring clamps, ensuring it’s taut and parallel to the car’s centerline.
7. Measurement Tools: A machinist’s ruler, angle iron or aluminum bar, and a digital angle gauge are essential for precise measurements. The angle iron or aluminum bar acts as a straight edge against the wheel rim for measuring toe and camber.
8. Camber and Caster Measurement: Use the digital angle gauge against the vertical bar to measure camber. Caster can be calculated by measuring camber change with the wheels turned at a specific angle.
9. Verification: Double-check measurements using toe plates to confirm accuracy and ensure the string box remains calibrated. This step is critical for reliable results.
10. Recording and Marking: Use a worksheet to record measurements consistently. Mark alignment bolt positions with paint markers or wax crayons to track adjustments and ensure they hold.
This DIY approach to race car laser alignment provides a cost-effective solution for achieving precise adjustments. With careful construction and diligent measurement, you can ensure your car’s alignment is optimized for peak performance on the track. Remember to always prioritize safety and double-check your work.


