
For automotive repair enthusiasts and professionals alike, having the right tools is crucial for effective diagnostics and repair. Among these specialized tools, the DME (Digital Motor Electronics) breakout box stands out as an invaluable asset for in-depth circuit testing and analysis. While professional-grade breakout boxes can be expensive, building your own DIY version is a cost-effective alternative that doesn’t compromise on functionality. This guide explores how to create your own DME breakout box using readily available components, transforming a simple project into a powerful tool in your Box Car Tools collection.
A DME breakout box is essentially an adapter that inserts between the vehicle’s wiring harness and the DME, or ECU (Engine Control Unit). It provides easy access to each pin in the wiring system, allowing for voltage, continuity, and signal testing without piercing or damaging wires. This is particularly useful for diagnosing electrical issues, sensor malfunctions, or communication problems within the engine management system. Instead of probing directly into delicate connectors, which can lead to damage, the breakout box offers a safe and convenient interface for connecting multimeter probes or oscilloscope leads.
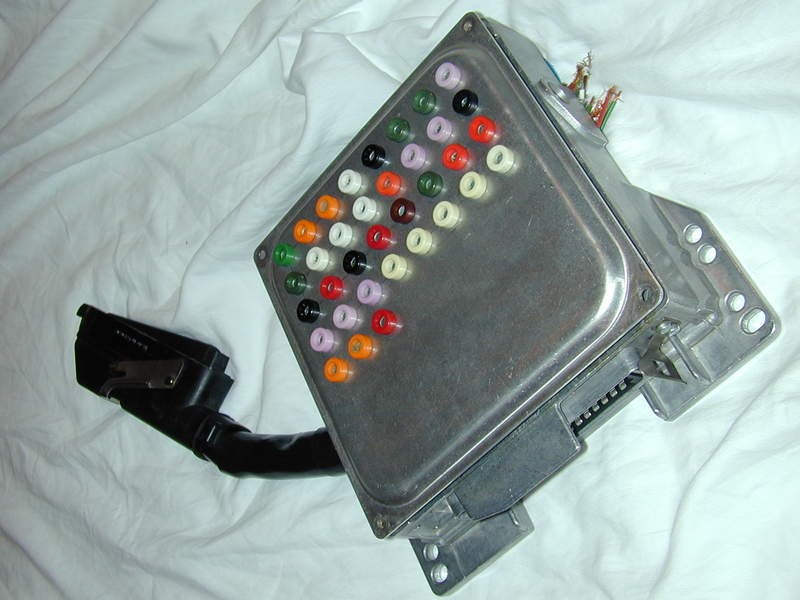
Building a DIY DME breakout box is a rewarding project that combines resourcefulness with practical application. The foundation of this project starts with repurposing an old DME box. As demonstrated by a resourceful car enthusiast, an old, non-functional DME box serves as the perfect housing. By gutting the internal circuit boards, you’re left with a robust, connector-ready enclosure. Sourcing a compatible 35-pin connector is the next key step. While new connectors can be challenging to find individually, exploring salvage yards or automotive electronics suppliers can yield results. In this instance, a resourceful approach involved acquiring a similar connector from a different vehicle and carefully extracting the necessary pins and wires. This highlights the adaptability often required in DIY box car tools creation.
To transform the DME box into a functional breakout tool, banana jacks are essential. These jacks provide convenient and secure connection points for test leads. Strategically drilling holes into the DME box lid and mounting rows of banana jacks creates an organized interface for accessing each pin. Color-coding these jacks based on functional groups like power, ground, and signals further enhances usability and reduces the risk of misconnections during testing. This methodical approach to organization is a hallmark of effective box car tools design, whether DIY or commercially manufactured.
The final steps involve the meticulous work of wiring. Each pin of the 35-pin connector needs to be soldered to a corresponding banana jack. Extending the wiring from the connector, through a strain relief point drilled into the DME box, and then to the banana jacks ensures a durable and professional finish. This internal wiring creates the crucial link, allowing signals from the DME connector to be easily accessed via the external banana jacks. Adding an extension cable with matching connectors further expands the breakout box’s versatility, enabling connection to the vehicle’s wiring harness while keeping the original DME connector accessible.
In conclusion, building your own DME breakout box is a testament to the DIY spirit in automotive repair. By repurposing components, employing resourceful sourcing strategies, and applying careful construction techniques, you can create a valuable addition to your box car tools. This project not only saves significant cost compared to purchasing commercial units but also provides a deeper understanding of automotive electrical systems. Whether you are a seasoned mechanic or a dedicated car enthusiast, a DIY DME breakout box empowers you to tackle complex diagnostic tasks with greater precision and confidence.