
This guide provides a comprehensive step-by-step procedure for replacing the blower motor in a 2007-2011 Volvo S80, V70, and XC70. Crucially, this process requires Volvo Special Tool 9997284, an absolute necessity for successful blower motor removal without dismantling the entire dashboard. This tool allows for precise detachment of the blower motor from its housing, preventing damage and ensuring efficient replacement.
This detailed walkthrough outlines the necessary tools, precautions, and specific steps to complete the job effectively. Expect a 4-6 hour timeframe for first-time attempts.
Required Tools for Interior Work Removal:
- Volvo Special Tool 9997284: Essential for removing the blower motor.
- T20 Torx Driver: For various screw removals.
- 8mm and 10mm Nut Drivers: For bolt and fastener removals.
- Ratchet Set with 8-13mm Sockets: For various bolt removals.
- Small Diagonal Cutters: For cutting zip ties.
- Small Needle-Nose Pliers: For delicate tasks and accessing tight spaces.
- Head-Mounted Light: For optimal visibility in confined areas.
Step-by-Step Blower Motor Replacement:
- Preparation: Park the car with easy access to the passenger side, set the AC to recirculate, move the passenger seat all the way back, unlock all doors, and disconnect the negative battery cable (wait 3 minutes before proceeding). Lower the steering wheel completely.
- Instrument Panel Removal: Remove the instrument trim panel, steering column cover, and the instrument cluster itself. Disconnect the cluster’s electrical connector.
- Blower Motor Access: Locate the blower motor behind the dashboard (passenger side) and disconnect its electrical connector.
- Trim and Glove Box Removal: Remove the right door opening threshold trim, front door opening trim, dashboard side trim, tunnel console trim, soundproofing, and the glove box. Disconnect all associated electrical connections.
- CEM and Bracket Removal: Carefully remove the CEM (Central Electronic Module) connectors, rotate and remove the CEM. If equipped with an iPod module, remove it cautiously, mindful of the fiber optic cables. Remove all cable clips from the CEM bracket and then remove the bracket itself.
- Recirculation Damper Removal: Remove the Air Quality Sensor (if equipped) and the recirculation damper motor cable. Remove the three Torx T20 screws holding the recirculation damper unit and carefully remove the unit.
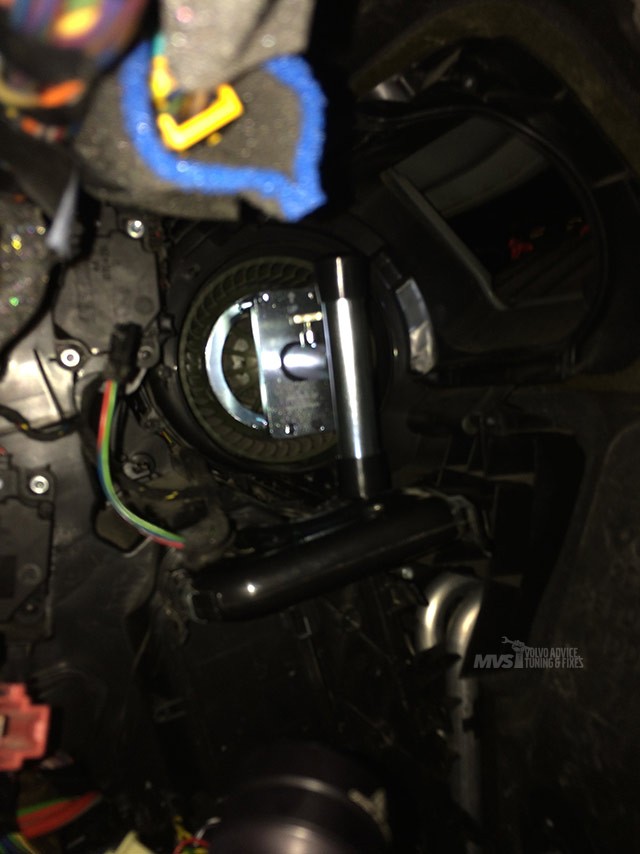
- Blower Motor Removal with Special Tool: Mount the inner part of Tool 9997284 onto the fan hub. Place the tool over the alignment pin and secure it. Break the mounting tab on the fan (using pliers) or have an assistant depress the locking tab while turning the tool. Remove the old blower motor.
- Blower Motor Installation: Mount Tool 9997284 onto the new blower motor. Install the new blower, ensuring all locking lugs engage. Remove the tool. Reassemble all components in reverse order.
- Reassembly and System Check: Reconnect the battery, observing airbag deployment precautions. Run the CEM “Checking communication and control module” procedure using VIDA/DiCE if available.
Conclusion
Replacing the blower motor in a Volvo S80/V70/XC70 requires patience, attention to detail, and the crucial Volvo Special Tool 9997284. This guide, coupled with the right tools, empowers you to tackle this task confidently and restore your vehicle’s climate control system. Remember to consult Volvo’s official documentation for specific torque specifications and further guidance.